







Step-by-Step Installation Guide for Flanged Gate Valves and Butterfly Valves
octubre 26, 2026
A maintenance crew in Peru installed a DN200 flanged gate valve on a municipal water main last year.
They bolted it tight, pressure-tested the line, and moved on. Three weeks later, water was weeping from the flange joint. The gasket had shifted during tightening. They had to drain the line, cut out the valve, and redo the whole connection.

The valve was fine. The installation was not.
Flanged gate valves and butterfly valves are among the most common components in water and fire protection systems. But installation mistakes are just as common—and just as expensive.
A misaligned gasket, an over-torqued bolt, or a valve installed in the wrong orientation can cause leaks, premature failure, or a failed inspection.
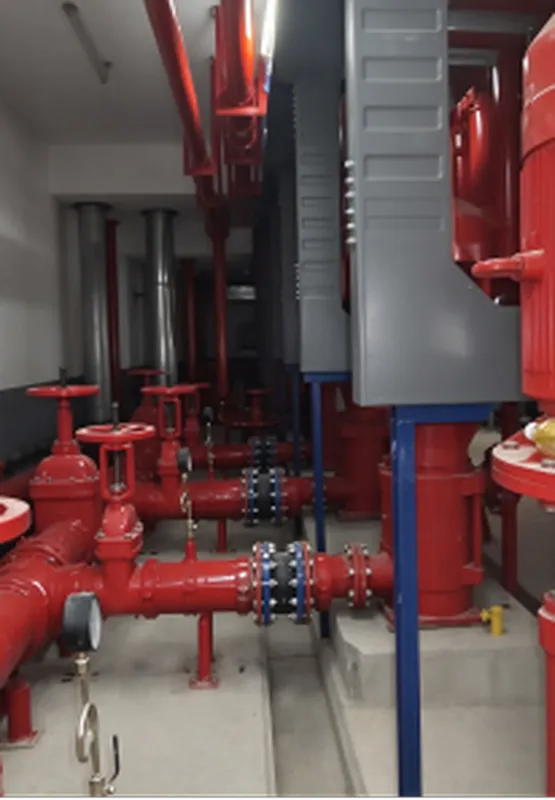
En Fluid Tech Group, we supply flanged gate valves and butterfly valves to projects across South America and worldwide. This guide walks you through the proper installation steps. Follow them, and your joints will pass the first pressure test.
Before You Start: Inspection and Preparation
Do not open the crate and start bolting. Preparation prevents most installation failures.
- Check the valve. Inspect the body for shipping damage. Check the flange faces for nicks or rust. Open and close the valve once by hand to confirm the stem moves freely. For butterfly valves, check that the disc rotates through 90° without binding.
- Check the gasket. Confirm the gasket material matches your media and temperature. EPDM for water. PTFE for chemicals. Graphite for high temperature. Check the gasket diameter against the flange raised face. A gasket that is too small restricts flow. One that is too large blocks bolt holes.
- Check the flange faces. Both the valve flange and the pipe flange must be clean, flat, and free of rust, scale, or old gasket material. A rough flange face will not compress the gasket evenly.
- Check the bolts and nuts. Use the correct size, grade, and length. Bolts should be long enough to fully engage the nut with at least two threads exposed. Do not reuse corroded bolts.
Installing a Flanged Gate Valve
Gate valves are commonly used for on-off isolation in water distribution and industrial pipelines. Many conventional gate valves allow flow in either direction, but the specific valve design and installation instructions should always be checked.
For project selection, explore Drifco’s Gate Valve category or, for fire protection applications, its dedicated Fire Gate Valve range.
- Step 1 – Position the valve. Lower the valve between the pipe flanges. Align the bolt holes. Do not force the valve into place—if the flanges do not line up, adjust the pipe supports, not the valve.
- Step 2 – Insert the gasket. Slide the gasket between the valve flange and the pipe flange. Center it on the raised face. Hold it in place with a small amount of compatible sealant or by threading two bolts through the bottom holes to support it.
- Step 3 – Insert the bolts. Insert all bolts through the aligned holes. Hand-tighten the nuts. Do not tighten any bolt fully yet.
- Step 4 – Tighten in a cross pattern. Tighten the bolts in a diagonal, alternating sequence—like tightening wheel lug nuts. Tighten in stages: first to 30% of final torque, then 60%, then 100%. This compresses the gasket evenly and prevents cocking the valve body.
- Step 5 – Check the gap. After final torque, check the gap between the valve flange and pipe flange. It should be even all the way around. An uneven gap means the valve is tilted or the gasket is not seated properly. Loosen and re-tighten if needed.
- Step 6 – Operate the valve. Open and close the gate valve fully. The handwheel should turn smoothly without excessive force. If it binds, the valve may be misaligned or the stem may be damaged.

Installing a Flanged Butterfly Valve
Butterfly valves use a rotating disc to control flow and are often selected for their compact design and quick operation. Their disc clearance and seat configuration make correct alignment particularly important.
Drifco offers several butterfly valve solutions for water systems. For fire protection projects, see the dedicated Fire Butterfly Valve category.
- Step 1 – Check the disc position. The valve should arrive in the closed position. Confirm the disc is centered in the bore. If the disc is partially open, close it before installation.
- Step 2 – Position the valve. Place the valve between the flanges. For wafer-type butterfly valves, the valve sits between two flanges with bolts passing through. For lug-type, the valve has threaded lugs and bolts thread directly into the valve body.
- Step 3 – Check stem orientation. The stem should be horizontal or vertical depending on your actuator setup. For manual handles, make sure the handle clears nearby pipes and structures. For actuated valves, check that the actuator has room to operate.
- Step 4 – Insert the gasket. Butterfly valves typically use a gasket on each side for wafer type, or a flange gasket for lug type. Center the gaskets carefully.
- Step 5 – Tighten the bolts. Follow the same cross-pattern sequence as for gate valves. Tighten in stages. Do not over-torque—excessive bolt tension can distort the butterfly valve body and cause the disc to bind.
- Step 6 – Operate the valve. Open and close the valve through 90°. The disc should rotate smoothly. Check that the disc does not contact the pipe wall or gasket. If it binds, loosen the bolts slightly, re-center the valve, and re-tighten.
Gate Valve vs Butterfly Valve Installation: Key Differences
Here is a quick comparison for the field.
| Installation Step | Flanged Gate Valve | Válvula de mariposa con bridas |
| Flow direction | Bidirectional | Bidirectional, but disc orientation matters |
| Stem orientation | Vertical preferred | Horizontal or vertical depending on actuator |
| Gasket placement | One gasket per flange joint | One or two gaskets depending on type |
| Bolt tightening | Cross pattern, staged torque | Cross pattern, staged torque—avoid over-torque |
| Disc/gate position during install | Any position | Closed position recommended |
| Space requirement | Tall—needs vertical clearance for stem | Compact—fits tight spaces |
| Final check | Handwheel turns freely | Disc rotates 90° without binding |
Common Installation Mistakes and How to Avoid Them
- Mistake 1 – Tightening one bolt fully before the others. This tilts the flange and pinches the gasket. Always use a cross pattern and staged torque.
- Mistake 2 – Using the wrong gasket material. EPDM gaskets fail in high-temperature service. Graphite gaskets fail in cold water. Match the gasket to the application.
- Mistake 3 – Installing a butterfly valve with the disc open. The disc can contact the pipe wall and get damaged. Close the disc before installation.
- Mistake 4 – Forcing misaligned flanges together. Pipe stress transfers to the valve body. Align the pipes first, then install the valve.
- Mistake 5 – Over-torquing butterfly valve bolts. Excessive bolt tension distorts the valve body and causes the disc to bind. Use a torque wrench and follow the manufacturer’s specification.
Why Installation Quality Matters in a Growing Market
The global industrial valve market reached USD 101.94 billion in 2025 and is projected to hit USD 147.19 billion by 2032. The water and wastewater valve segment alone is growing from USD 7.77 billion in 2025 to USD 9.43 billion by 2030. Flanged gate valves and butterfly valves represent a significant share of that demand.
But growth in demand does not excuse poor installation. A failed joint means rework, delays, and lost profit. Proper installation protects your schedule and your reputation.
At Fluid Tech Group, we provide installation guides, torque specifications, and technical support with every valve shipment. Our team can review your installation plan or join a video call to walk your crew through the process. For buyers who need customized configurations, private-label products, or manufacturing support, the company’s OEM/ODM valve manufacturing services offer a starting point for discussing product requirements.
Your Next Step
Do not let a gasket or a bolt ruin your project. Install flanged gate valves and butterfly valves correctly—every time.
Send us your valve requirements. Tell us your valve type, size, pressure rating, and flange standard (ASME, EN, or other). We will provide a quotation with full documentation, torque specifications, and installation guidance.
Fluid Tech Group
Flanged gate valves and butterfly valves – installed right, sealed tight, documented throughout